
How to Transfer Disposable Camera (QuickSnap) Photos to Phone Without Paying Lab Fees
From dropping off your disposable camera at a lab to digitizing the negatives with your smartphone and free browser tools without recurring scan fees. A complete guide to saving money on film scans.
Disposable cameras like the Fujifilm QuickSnap (known as 'Utsurundesu' in Japan) are more popular than ever for parties, road trips, and weddings. But after winding that thumbwheel through 27 exposures, every beginner hits the exact same roadblock: How do you get the pictures from a plastic box with no screen, no Bluetooth, and no USB port onto an iPhone or Android phone?
Inside that plastic casing is a standard roll of 35mm color negative film. Do not attempt to crack open the camera yourself in room light — exposure to ambient light destroys undeveloped film instantly. Getting the pictures onto your phone requires chemical development first, but you do not need to pay the exorbitant digital transfer fees charged by commercial labs.
1. Where to take your disposable camera (Can you develop at Walmart/CVS?)
You cannot develop disposable film at home without chemistry tanks, nor can you do it at convenience stores. You need a dedicated photo lab or pharmacy with DPE service:
- Local Independent Photo Labs: The best choice. They return your physical negative strips (essential!) and usually finish within 1–2 hours or the next day.
- Specialty Film Labs (e.g., The Darkroom, Reformed Film Lab, Memphis Film Lab): Mail-in services that handle developing and return clean negative sleeves.
- Big-Box Pharmacies (Walgreens, CVS, Walmart): *Warning:* Many modern drugstore branches ship film to third-party factories and destroy your physical negatives, only giving you low-res 2MP scans on a CD or web link. Always ask beforehand if negatives are returned.
2. The Storefront Pricing Trap: Development vs. Digital Scanning
When you hand over your disposable camera at the counter, the store clerk will typically quote two separate services:
- Development (Process C-41): Unrolling the camera in a dark room and running it through chemistry to produce visible transparent orange negatives. Cost: ~$5.00 to $9.00.
- Digital Transfer / Cloud Scans: Running the developed negative through an automated lab scanner to upload compressed JPEGs to Dropbox or send a download link. Additional Cost: +$10.00 to $16.00.
Scanning costs more than the camera itself
A Fujifilm QuickSnap costs around $16. As analyzed in our breakdown of commercial film developing and scanning costs, paying for both development and lab scans pushes the total to $18 to $25 per roll — making digital delivery cost more than the camera and film combined.
3. The Secret Order: Ask for 'Develop Only, Return Negatives'
To avoid the markup, order with this exact phrasing at the counter or on the mail-in order slip:
'I would like Develop Only with uncut/cut negative return, please. No digital scans or prints needed.'
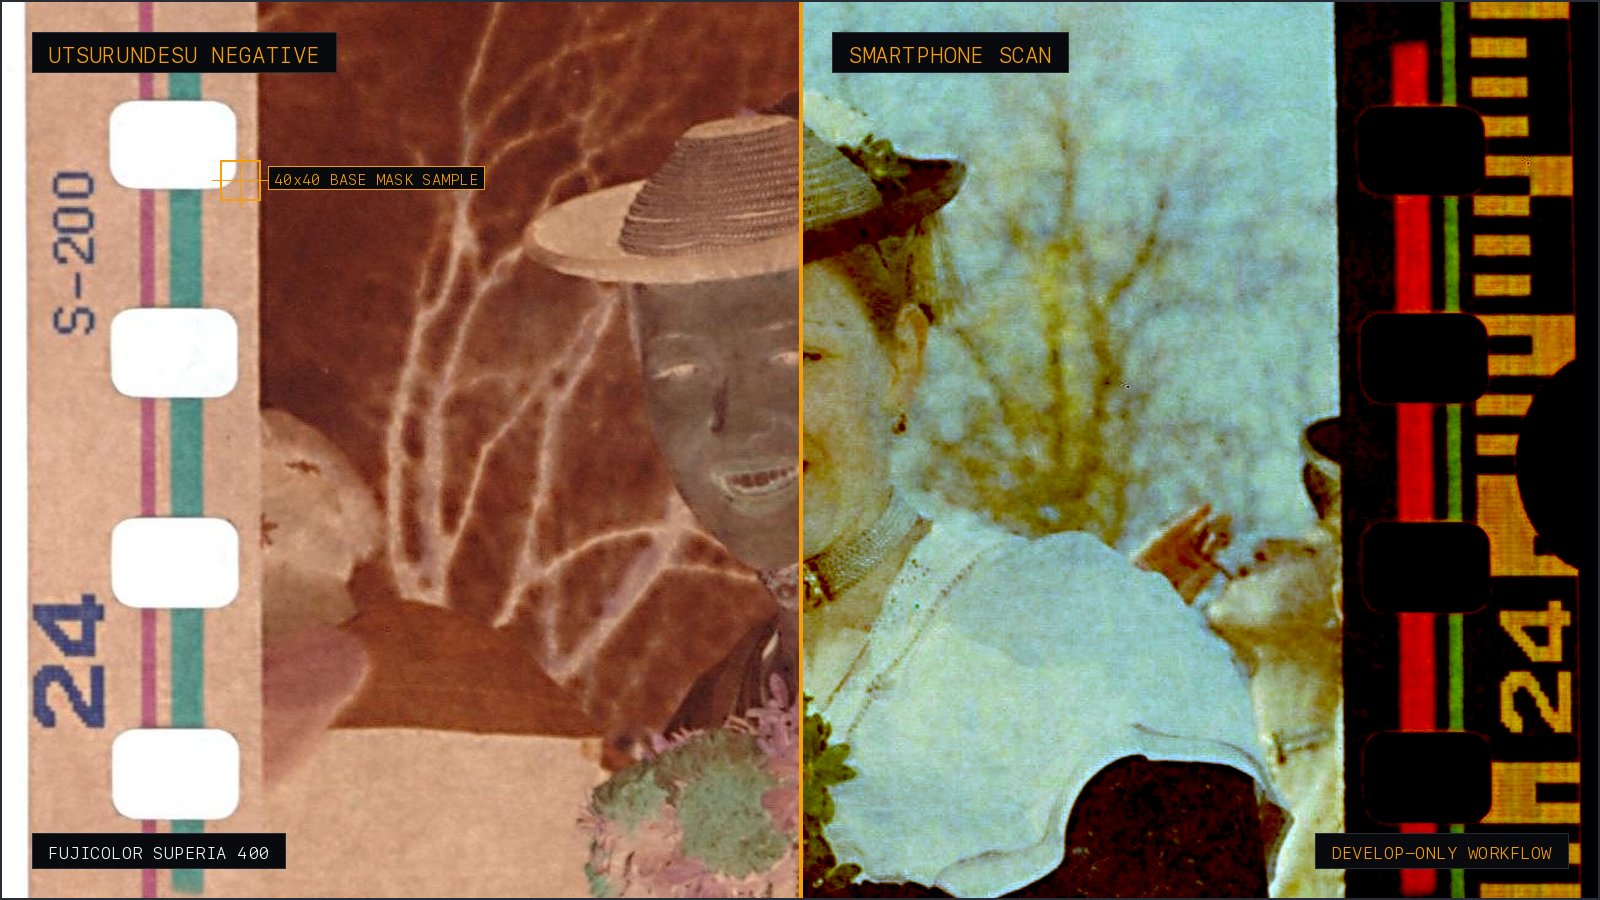
You pay only the base processing fee ($5 to $8). When the order is ready, you pick up a small sleeve containing your amber-colored negative strips.
4. How to Scan Negatives to Your Phone at Home (Zero Expensive Gear)
You do not need a bulky $400 flatbed scanner. Following the core workflow for how to invert film negatives at home, your smartphone camera (12MP–48MP) possesses more resolving power than standard commercial lab mini-scanners. All you need is:
- A Backlight: An iPad, tablet, or secondary phone displaying a pure white screen at 100% brightness.
- Spacers: Place a clean piece of clear acrylic or glass a few millimeters above the screen to blur out individual screen pixels (preventing moiré patterns).
- Shoot in the Dark: Turn off room lights. Hold your phone parallel over the negative, lock AE/AF, and take a crisp photo of each frame.
- Include the Orange Border: Always include a sliver of unexposed orange film base or sprocket holes in the shot — this serves as the calibration reference.
5. Why Built-In Phone 'Invert Colors' Turns Faces Cyan
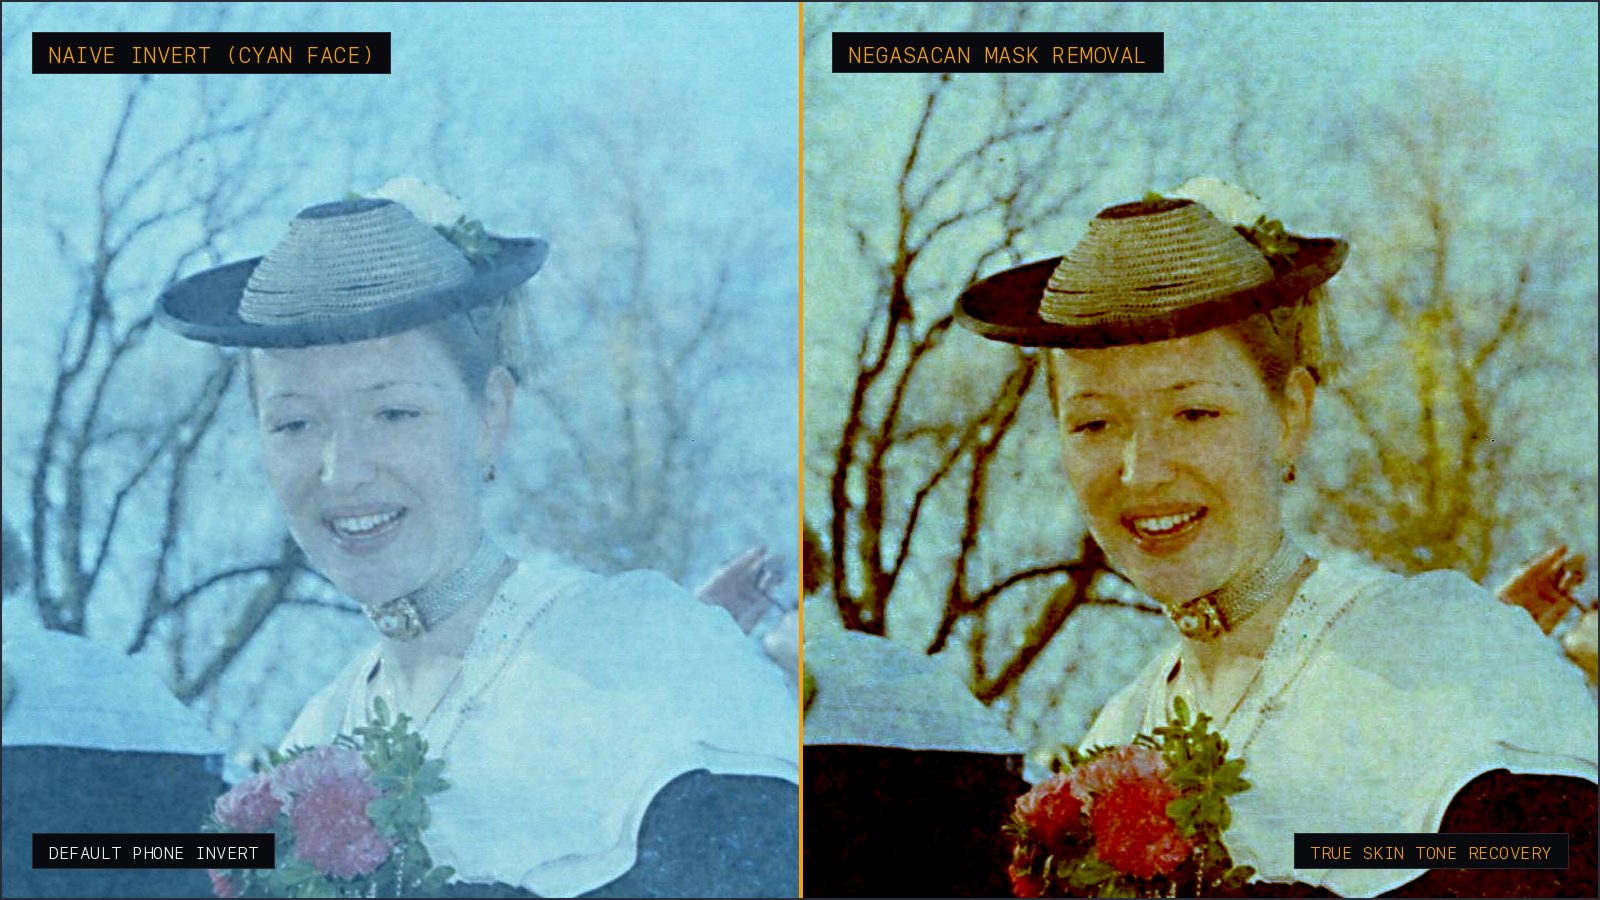
If you take that photo and turn on iOS or Android's accessibility 'Invert Colors', the image looks like an unrecognizable ghost: faces turn sick cyan and shadows turn muddy navy.
C-41 film incorporates dyed color couplers that leave a dense orange tint across the base. As detailed in our deep dive on C-41 orange mask removal math, a naive inversion (1.0 - RGB) simply inverts that orange into bright complementary cyan. Proper conversion requires optical density subtraction in logarithmic space.
6. Instant One-Click Inversion with NegaScan in Your Browser
NegaScan solves this math on-device using WebGL shaders directly in your mobile browser without installing apps or paying subscriptions:
Interactive demo using Fujicolor Superia 400 (the stock inside QuickSnap cameras). Drag the center slider to watch the orange mask vanish.
- Open NegaScan in Safari or Chrome on your phone.
- Upload your camera-scanned negative photo.
- Tap the unexposed orange border to sample the film base. The WebGL shader subtracts the mask across 40×40 samples.
- Select the 'Fujifilm Superia' profile to snap highlights and skin tones to genuine film color curves.
- Export your full-resolution positive directly to your camera roll. 100% private, zero uploads to external servers.
Technical FAQ
- Can an app scan the disposable camera before it is developed?
- No. Undeveloped film contains only latent chemical reactions. It has not been fixed by C-41 chemicals and cannot be digitized by any camera or AI software. Opening the camera before lab development will ruin the film forever.
- Is scanning at home worse quality than paying the lab $15 for scans?
- In most cases, home camera scans are actually sharper. Entry-level lab scans are compressed 2MP to 4MP JPEGs (around 1800x1200 pixels). Modern smartphone cameras capture 12MP to 48MP of raw sensor data with far greater dynamic range and sharpness.
- Can I use this method to digitize old disposable camera negatives from years ago?
- Absolutely. Any standard 35mm color negative strips found in shoe boxes or photo albums can be backlit, photographed, and converted into high-resolution digital files with NegaScan for free.
Keep reading
- How to Invert Film Negatives on Phone Without a $48/Year Subscription (Best Film Scanner Apps 2026)A comprehensive review of mobile film scanner apps. Exposing the predatory weekly subscription traps of FilmBox and Photomyne, and comparing one-time buyout alternatives like NegaScan.
- Lab Film Scanning Cost Hike: How to Digitize Negatives at Home for FreeCommercial photo labs are raising fees for film development and smartphone transfer. Learn how to order develop-only and digitize C-41 negatives at home using your phone and browser.